
Chapters, scenes & beats
This is the stage to slow down on. By now your plot is fully worked out — acts, chapters, scenes, and the beats inside each scene — and everything here feeds the prose. Before you render a word, this is where you read the plot back and tune it. It’s the cheapest, highest-leverage place to shape what actually happens in your book.
The whole book at a glance
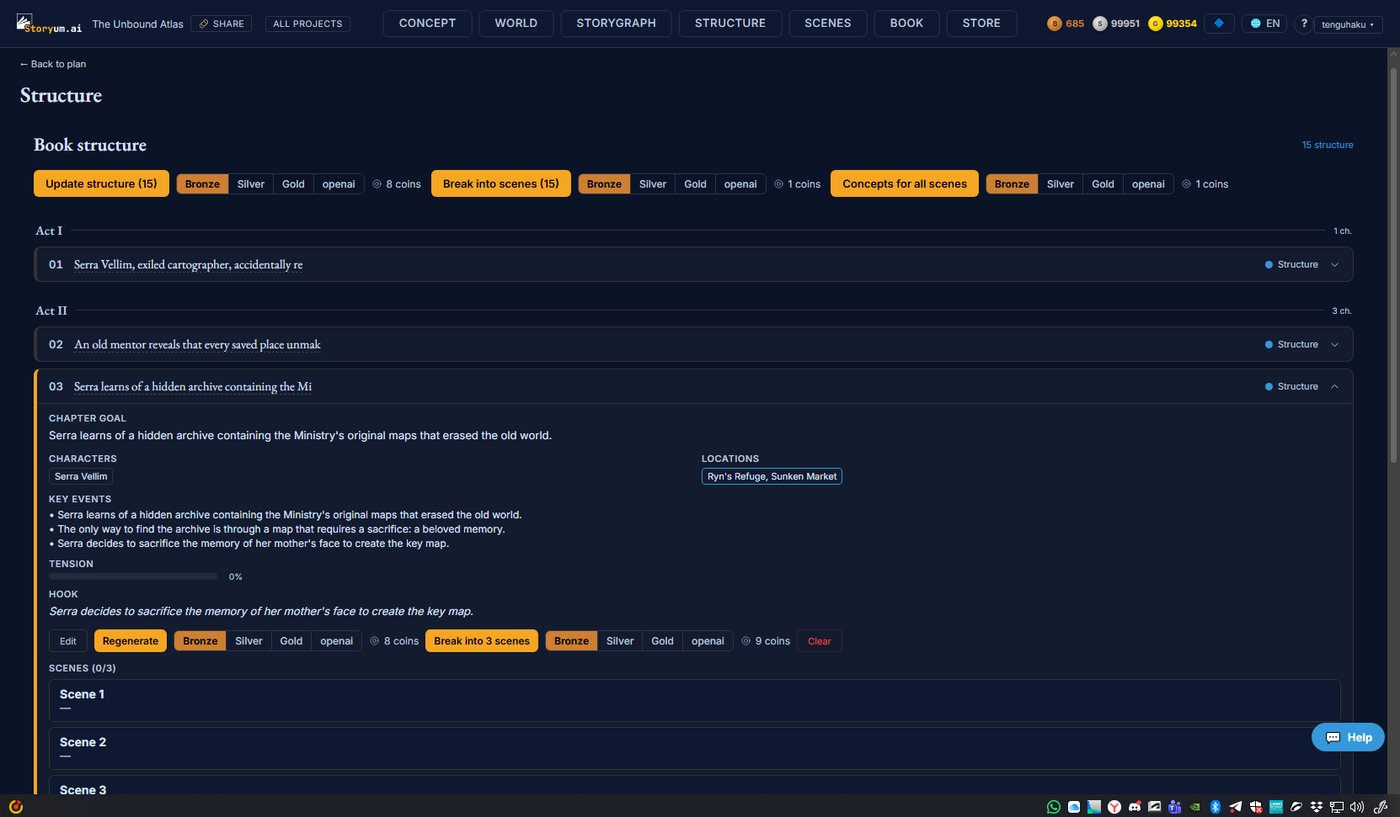
The book is laid out as acts and chapters. The top bar acts on everything at once: Update structure (re)generates the chapter skeleton, Break into scenes splits every chapter into scenes, and Concepts for all scenes drafts a concept for each. Each has a quality-tier pill — use Bronze or Silver here: this is structural work, not final prose, so a fast tier is plenty (save Gold for the render).
Inside a chapter
Expand a chapter and you see everything the writing must honour: its goal, characters, locations, key events, a tension read-out, and the hook into the next chapter. Per chapter you can Edit any of these by hand, Regenerate the whole chapter, Break into N scenes, or Clearit. Nothing is locked — the plot is yours to tune before you go deeper.
Inside a scene
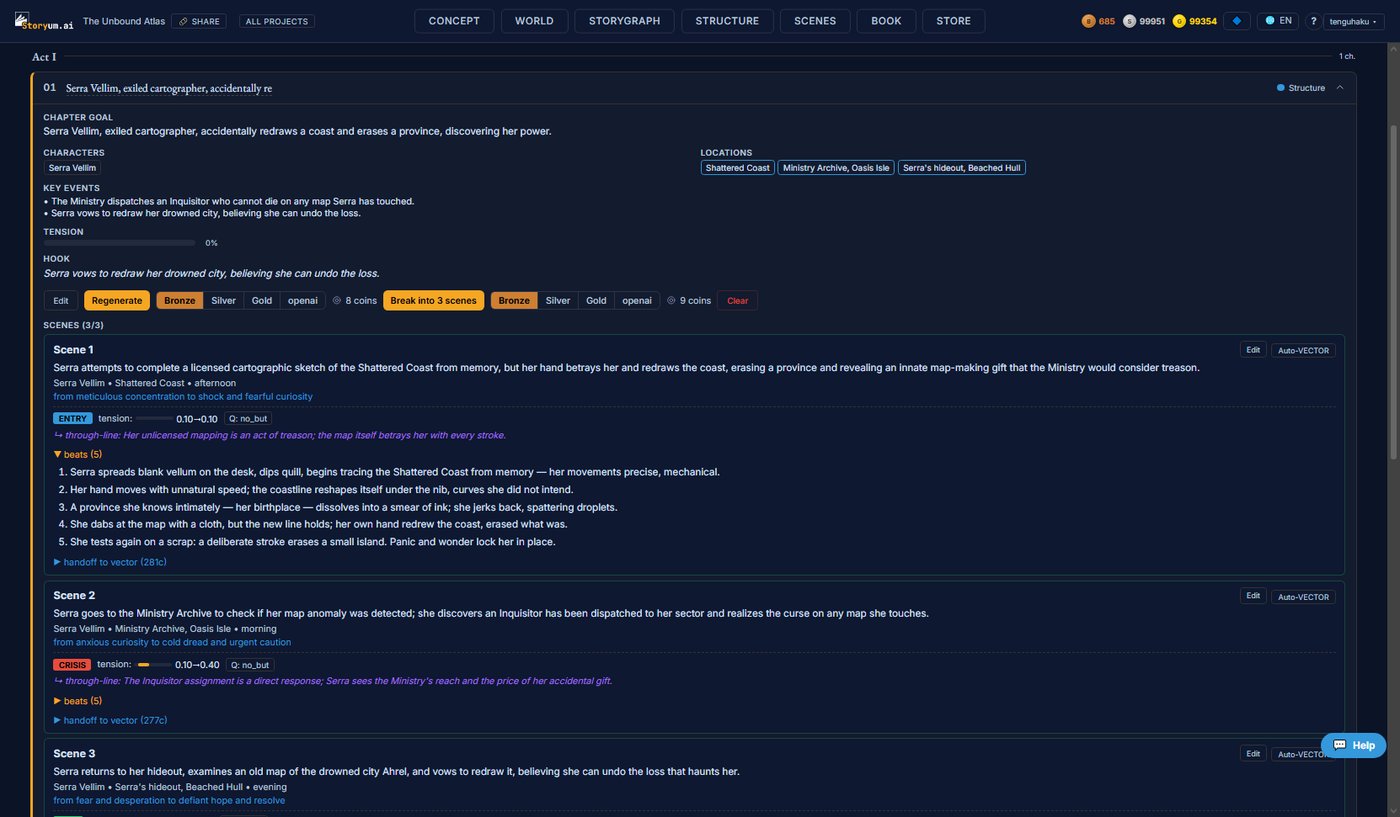
Break a chapter down and each scene carries its own plan: a goal, the viewpoint, location and time, a position badge (entry · crisis · exit), a tension curve (e.g. 0.10 → 0.40), a through-line, and — the heart of it — its beats. The Auto-VECTOR button turns a scene into the concept the render works from.
The scene editor — where you tune the plot
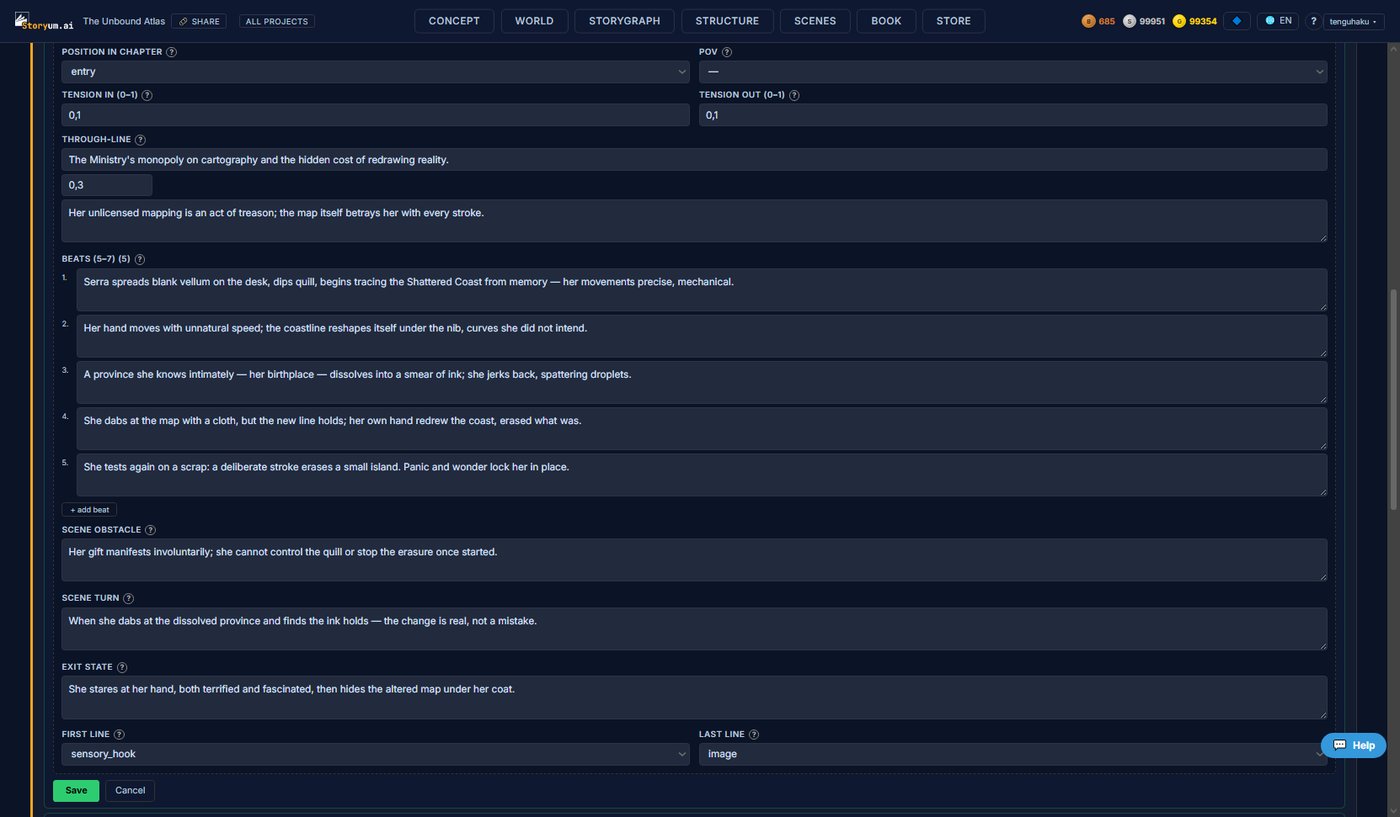
Hit Edit on a scene and everything opens up. The top fields set the scene’s frame — goal, cast, location and time, the emotional shift, its key events and the connection to the next scene. Under “Advanced fields” sit the levers the render actually writes from:
- Position in chapter — entry · development · crisis · exit — where the scene sits in the chapter’s arc
- Tension in → out — the pressure the scene starts and ends on (0–1) — the shape of its rise or release
- Through-line — the one thread this scene carries through the chapter
- Beats — the beat-by-beat breakdown (5–7) — the moves the scene is written from. Edit, add or remove them
- Scene obstacle — what pushes back inside the scene
- Scene turn — the moment the scene pivots
- Exit state — the state things settle into as the scene ends
- First / last line — the opening and closing move (sensory hook, image, line of dialogue…)
These advanced fields are auto-generated (that’s what Auto-VECTOR does), but any edit you make holds until the next regeneration — so you can hand-tune a scene and it stays tuned.
The Auto-VECTOR settings — how the scene reads
The Auto-VECTOR button doesn’t just fire — it opens Scene Vector Settings, four dials that shape how the scene reads before you spend the vector. The vector is the concept the render writes the prose from, so these choices steer the prose without you writing a word.
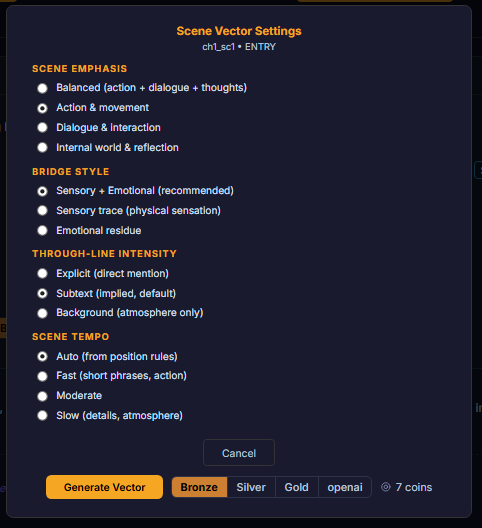
- Balancedaction + dialogue + thoughts, evenly (the default)
- Action & movementlean into what’s done and happening
- Dialogue & interactionlean into what’s said between characters
- Internal world & reflectionlean into thought and interiority
- Sensory + Emotionalboth a physical sensation and an emotional after-image (recommended)
- Sensory traceclose on a physical sensation
- Emotional residueclose on an emotional after-image
- Explicitstated directly — in a line, a thought, or an action
- Subtextpresent, but implied rather than said (the default)
- Backgroundonly in the atmosphere — a detail or hint, never named
- Autoderived from the scene’s position (entry/crisis/exit) — the default
- Fastshort phrases, lots of action
- Moderatean even pace
- Slowdetails, atmosphere, inner world
Leave them on the sensible defaults for a first pass; reach for them when a specific scene wants a specific feel — an action beat kept fast, a quiet turn played as internal and slow, a threat you’d rather keep in the background. As with everything at this stage, Bronze or Silver is plenty.
Review your beats — before the prose is written
So before you move on to render: read the beats of each scene. Do they land the events you wanted? Does the tension rise where it should? Does the turn actually turn? Edit anything that’s off — rewrite a beat, add one, drop one, sharpen the obstacle or the exit-state. Get the beats right here and the prose follows, because the render writes from them. It’s the single highest-leverage edit you can make in the whole pipeline.
When the beats read the way you want, you’re ready for the next stage — turning each scene into prose.